
Takedown day has a reputation for taking longer than install day, and for ending in tears (sometimes the parent's). It does not have to. With the right tools and a sensible order of steps, you can take down braids, cornrows and twists faster without trading speed for broken hair.
Set up before you start
Gather everything first so you are not hunting for a comb with half a head of hair undone:
- A rat-tail comb or pick for loosening braids from the bottom up.
- A braid takedown tool. We carry the Unbraider comb, made for taking down braids, twists and cornrows; look for it on our Combs, Bandanas & Headwear page.
- A wide-tooth comb or a smooth bone comb for detangling. The bone combs on the same page are seamless, so they do not snag.
- A spray bottle of water with a little conditioner mixed in, for slip.
- Small, sharp scissors, only if the braids have added hair.
- Clips to hold finished sections out of the way.
- A bowl for beads, snaps and barrettes.
- A favorite show or audiobook for your child. This one matters more than you would think.
Step 1: Take out the accessories
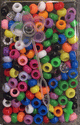
Remove every bead, snap and barrette before you unbraid anything. Open each snap and unwind the hair from the hinge rather than pulling it off the end. Slide beads off gently. If a bead is stuck, mist the braid end and wiggle it rather than yanking. Our guide to using hair snaps explains how they come out cleanly.
Step 2: Trim extensions carefully
If the braids have added hair, you can save a lot of time by cutting off the extra length first. Feel along the braid to find where your child's own hair ends, then cut well below that point. When in doubt, cut lower. You can always unbraid a little more, but you cannot uncut natural hair.
Skip this step entirely for braids with no added hair.
Step 3: Unbraid from the bottom up
Work on one braid at a time, starting from the end. Use the tail of the comb or your takedown tool to loosen the braid a section at a time, working up toward the scalp. Mist with your water-and-conditioner mix as you go so the hair slides apart instead of tearing.
Start at the nape and work toward the front. The back is usually the most tangled and the hardest to see, so it is best done while everyone is still patient.
Step 4: Clean out the shed hair
Once a braid is undone, you will see a surprising amount of loose hair at the root. Do not panic. Everyone sheds hair every day; the American Academy of Dermatology puts normal shedding at roughly 50 to 100 hairs a day. While the hair is braided, that shed hair has nowhere to go, so it all comes out at once.
Before moving on, gently finger-detangle the section and comb the shed hair out, starting at the ends and working up to the root. Doing this now, while the hair is dry or lightly damp, prevents those loose hairs from turning into a knot in the wash.
Step 5: Twist each section
Loosely twist or plait each finished section and clip it out of the way. It keeps the hair separated and makes wash day much easier than dealing with one big cloud.
Step 6: Wash and condition
Wash the scalp gently, then follow with a good conditioner and detangle in sections with a wide-tooth comb. After weeks in a style, the hair will thank you for a deep condition. Let it rest before the next style goes in.
Cornrows and twists
Cornrows
Remove any accessories, cut off extensions below the natural hair if you used them, then lift the end of the cornrow and unpick it an inch or two at a time along the row. A pick or takedown tool helps lift the stitches without pulling at the scalp.
Twists
Twists are the easiest of all. Remove the snaps, mist, and unwind each twist with your fingers. Separate gently and clean out shed hair at the base just as you would for braids.
Speed tips that do not cost you hair
- Use two pairs of hands. Two adults working on opposite sides cut the time in half.
- Split it over two evenings. Take down half one night, twist it up, and finish the next day. Nobody's patience lasts four hours.
- Keep the hair damp, not soaking. Wet hair swells and tangles more easily.
- Never rip through a knot. Hold the hair above the knot and pick it apart from the bottom.
- Start before the style is overdue. Braids left in too long mat at the roots, and matting is what makes takedown slow. Our guide to protective styles for kids covers how long styles usually last.
What to look for once the hair is out
Takedown is a good chance to check your child's scalp and edges. A little extra shed hair is normal. Thinning edges, bald patches, sore spots or bumps along the hairline are not. If you see those, give the hair a break, go looser next time, and talk to your pediatrician or a dermatologist if it does not improve.
Aftercare and the next style
Give the hair a day or two in a simple, low-tension style before the next install. Cover it at night with a satin cap or bonnet; our guide to satin sleep caps and bonnets helps you choose one. Then wash the beads and snaps you saved, sort them by color, and you are ready to start again. If any went missing along the way, you can top up on our Hair Beads and Hair Snaps pages.